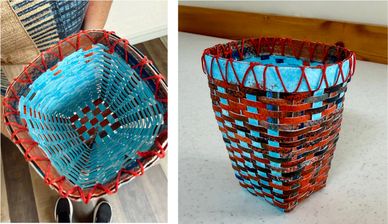
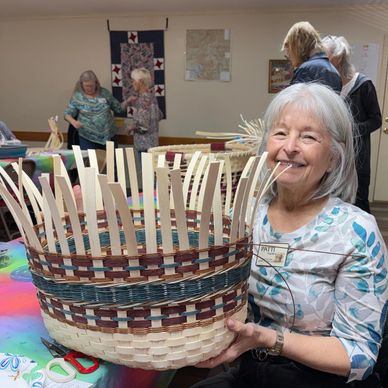
June 2026 - Paper Basket
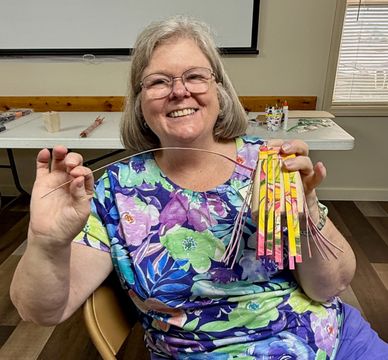
Denise is ready to teach our class!
Denise is ready to teach our class!
Denise is ready to teach our class!
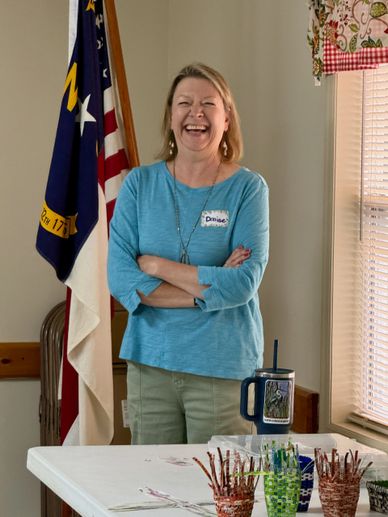
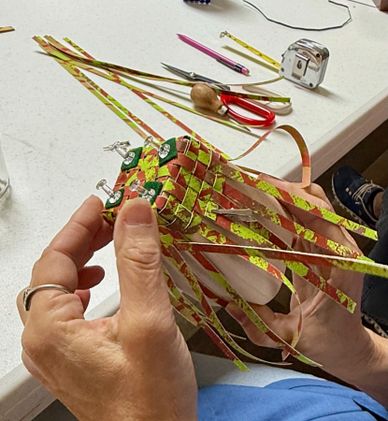
What a great class we had this month! Denise was the recipient of the $200 scholarship in 2024. She decided to learn how to make paper baskets at John C Campbell. Then she presented her plan to the board and we were thrilled to learn how to use this new medium. Denise and members of the board worked together to create beautiful paper and then gathered the elements for the kits for all interested members.
Time to build a kit!
Denise is ready to teach our class!
Denise is ready to teach our class!
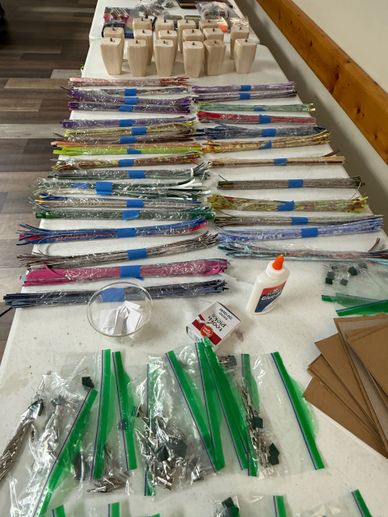
The kit included the mold, paper painted and cut to size, alligator clips, waxed linen....and lots of other goodies! All for $20!
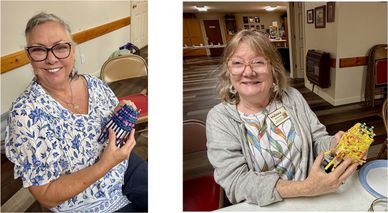
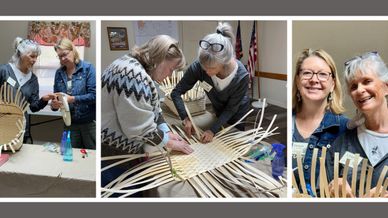
Leslie assists new member Holly
Denise is ready to teach our class!
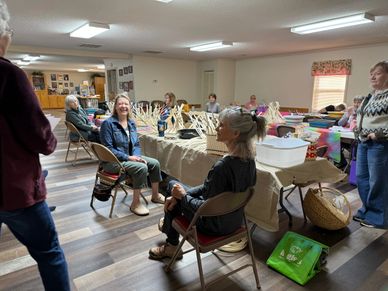
Janice and Sharon set up the base
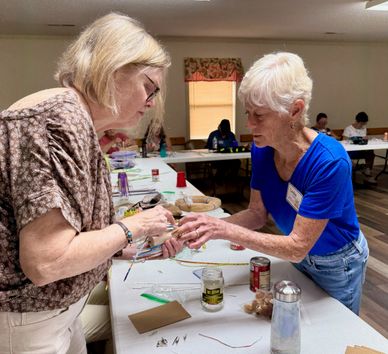
Welcome Holly! Holly jumped in with both feet and had great fun making her very first basket. We look forward to having her in the guild. Holly comes to us from the. music world. Her instrument is the french horn, along with skills in many other instruments. She moved here from Tallahassee, Florida.
Janice and Sharon set up the base
Janice and Sharon set up the base
Janice and Sharon set up the base
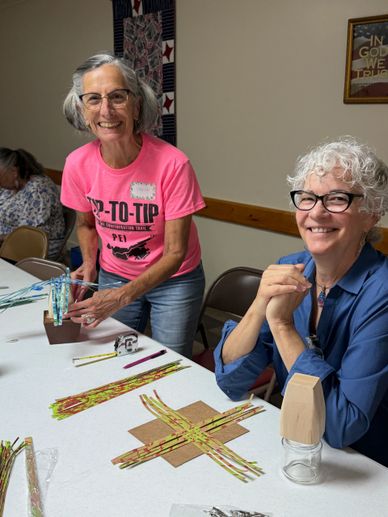
The first step is to decide which color of the paper will be on the inside and outside. Then build a base of 5 x 5 pieces of "linguine" sized strips of paper.
Securing the basket to the mold
Janice and Sharon set up the base
Securing the basket to the mold
Note the little pieces of felt under the pins used to protect the paper on the bottom of the basket.
The mold helped weavers to set the spacing of the spokes throughout the weaving process.
Lynn and Ginny
Janice and Sharon set up the base
Securing the basket to the mold
Lynn and Ginny have returned from Florida! Both of these sweet ladies have been members for many years. Note that the baskets are built on a mold supported by a cup, glass or other mold.
Shirley and Polly
Denise demonstrates how to finish the basket
Denise demonstrates how to finish the basket
These two talented ladies bring lots of weaving experience to the guild. So much joy!
Denise demonstrates how to finish the basket
Denise demonstrates how to finish the basket
Denise demonstrates how to finish the basket
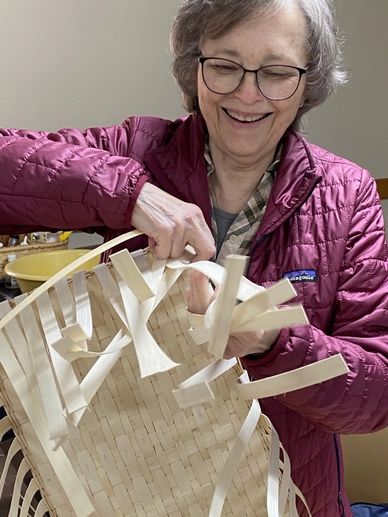
Now that the mold has been removed, Denise P shows Lynn and new member Denise T how to add the rim.
Denise T brings lots of experience in broom making to the guild! We look forward to learning this age-old craft from her!
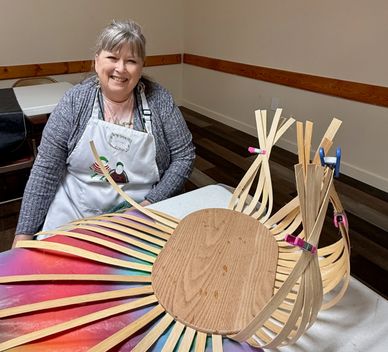
Creativity Abounds
Denise demonstrates how to finish the basket
One basket - different looks

The paper baskets offer a wonderful opportunity to be creative in color selection, weaving sequence, spoke color choices and design. Check out these three designs!
One basket - different looks
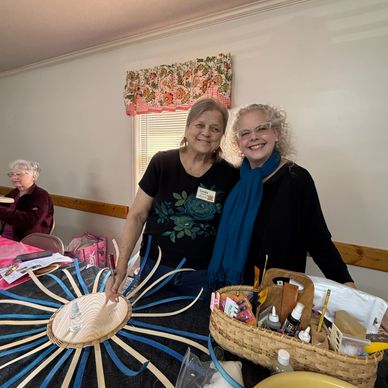
Kimi and Melissa - how color impacts the basket.
One basket - different looks
This basket looks so different on the inside and the outside. When making the paper, think about how your color choices will impact the options you have, and the final look of the basket.
Lisa creates a spring inspired basket.
Kimi and Melissa - how color impacts the basket.
Kimi and Melissa - how color impacts the basket.
Lisa is also a "graduate" from a John C. Campbell Folk School paper-making class. In fact, she has already assisted in two classes at the Folk School. Lisa was one of the Board members who painted the paper for our class. Thinking that painting the paper was half the fun of creating the basket!
Kimi and Melissa - how color impacts the basket.
Kimi and Melissa - how color impacts the basket.
Kimi and Melissa - how color impacts the basket.
Kimi and Melissa both used the color of their paper to achieve a special look. Melissa had very bold multi-colored paper, so she used mostly one side and a simple over-under weave with great results. Kimi selected paper with more plain complementary colors and used those to create a distinct blue basket with a hot pink accent!
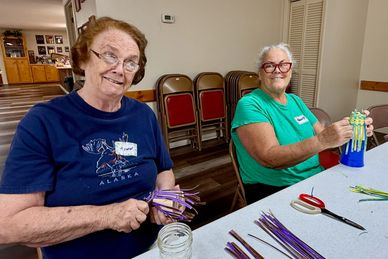
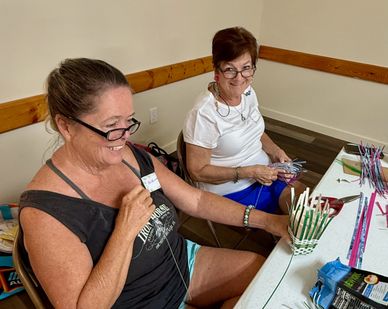
May 2026 - Stasia with Double Braided Rim
Cindy, Kimi and Patti with their Stasia Baskets

The Stasia basket featured a very nice Double Braided Rim. The directions were purchased on Etsy from Bright Expectations Baskets LLC / Becky Bechtel. The directions were so excellent , that many weavers arrived with nearly completed baskets. We also posted/shared a Beverly Ashton Vickers video for the Simple Double Braided Rim that added to our understanding of the rim of this basket.
Kimi and Sharon

Kimi shows Sharon how to lock in the spokes with a chase weave.
Vickie selects bright colors!
Vickie selects bright colors!

It was great to have Vickie back. She is teaching basketry at William Holland School this year.
Linda uses shades of blue
Kimi and Patti admire sweet grass baskets made by our newest member, Guylaine.
Vickie selects bright colors!

The Stasia basket used two different sizes of spokes to create an elegant pattern. Linda modified her basket and used 7 mm RO as a weaver.
Leslie and Vickie catch up
Kimi and Patti admire sweet grass baskets made by our newest member, Guylaine.
Kimi and Patti admire sweet grass baskets made by our newest member, Guylaine.

Vickie is making great progress on her basket!
Kimi and Patti admire sweet grass baskets made by our newest member, Guylaine.
Kimi and Patti admire sweet grass baskets made by our newest member, Guylaine.
Kimi and Patti admire sweet grass baskets made by our newest member, Guylaine.

Welcome to Guylaine! After taking a class on sweet grass baskets at John C. Campbell, "G" was hooked on basket weaving. We are excited to have her join the guild.
Leslie and Linda

Leslie and Linda discuss the next steps to start the braided Rim border. Note the towel in the basket! This step requires a lot of water to keep the weavers pliable!
Lynn and Linda

Lynn brought a complicated tray by Laura Lee Zanger. Linda and Lynn are figuring out the sequence for the twill to create a red cardinal.
Happy Weaving!
Adding a little bling!

Guylaine, Linda, Kimi, Denise, Sharon, and Leslie are all working at their table at different stages of the basket weaving process. Denise commented that using the mold was helpful to shape her basket. Sharon and Leslie discuss how to end a chase weave. Guylaine is enjoying practicing her new skill in Sweet Grass basketry. Note her beautiful baskets! Hard to believe that these were her very first baskets! Impressive!
Adding a little bling!
Adding a little bling!

Kimi added beads to her rim for a lovely accent! She also tried a little something different. When she stained her wood base, she also stained her 1/2" FF spokes to match. Kimi said she had to soak the spokes a little longer. Love the effect!
Lisa brings a tray for show and tell!

Last year, Lisa attended a GBA event that featured Laura Lee Zanger. This twill was a challenge! It's a tray that Lisa will treasure for many years to come.
Linda and Sandy

Sandy and Linda brought their own projects to weave. It's always fun to just come with whatever you have to weave... or a gift you want to finish!
May 2026 - Stasia with Double Braided Rim
Cindy, Kimi and Patti with their Stasia Baskets
The Stasia basket featured a very nice Double Braided Rim. The directions were purchased on Etsy from Bright Expectations Baskets LLC / Becky Bechtel. The directions were so excellent , that many weavers arrived with nearly completed baskets. We also posted/shared a Beverly Ashton Vickers video for the Simple Double Braided Rim that added to our understanding of the rim of this basket.
Kimi and Sharon
Kimi shows Sharon how to lock in the spokes with a chase weave.
Vickie selects bright colors!
Vickie selects bright colors!
It was great to have Vickie back. She is teaching basketry at William Holland School this year.
Linda uses shades of blue
Kimi and Patti admire sweet grass baskets made by our newest member, Guylaine.
Vickie selects bright colors!
The Stasia basket used two different sizes of spokes to create an elegant pattern. Linda modified her basket and used 7 mm RO as a weaver.
Leslie and Vickie catch up
Kimi and Patti admire sweet grass baskets made by our newest member, Guylaine.
Kimi and Patti admire sweet grass baskets made by our newest member, Guylaine.
Vickie is making great progress on her basket!
Kimi and Patti admire sweet grass baskets made by our newest member, Guylaine.
Kimi and Patti admire sweet grass baskets made by our newest member, Guylaine.
Kimi and Patti admire sweet grass baskets made by our newest member, Guylaine.
Welcome to Guylaine! After taking a class on sweet grass baskets at John C. Campbell, "G" was hooked on basket weaving. We are excited to have her join the guild.
Leslie and Linda
Leslie and Linda discuss the next steps to start the braided Rim border. Note the towel in the basket! This step requires a lot of water to keep the weavers pliable!
Lynn and Linda
Lynn brought a complicated tray by Laura Lee Zanger. Linda and Lynn are figuring out the sequence for the twill to create a red cardinal.
Happy Weaving!
Adding a little bling!
Guylaine, Linda, Kimi, Denise, Sharon, and Leslie are all working at their table at different stages of the basket weaving process. Denise commented that using the mold was helpful to shape her basket. Sharon and Leslie discuss how to end a chase weave. Guylaine is enjoying practicing her new skill in Sweet Grass basketry. Note her beautiful baskets! Hard to believe that these were her very first baskets! Impressive!
Adding a little bling!
Adding a little bling!
Kimi added beads to her rim for a lovely accent! She also tried a little something different. When she stained her wood base, she also stained her 1/2" FF spokes to match. Kimi said she had to soak the spokes a little longer. Love the effect!
Lisa brings a tray for show and tell!
Last year, Lisa attended a GBA event that featured Laura Lee Zanger. This twill was a challenge! It's a tray that Lisa will treasure for many years to come.
Linda and Sandy
Sandy and Linda brought their own projects to weave. It's always fun to just come with whatever you have to weave... or a gift you want to finish!
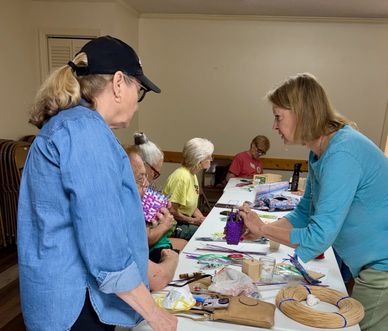
April 2026. Laundry Baskets (or a basket of your choice)
Linda reviews safety procedures
Jackie selects the Gabbie Basket
Linda reviews safety procedures
Who would have thought that we would actually have fun doing our own practice fire drill? Thank you to Linda for writing our evacuation procedures for emergencies. Safety first!
Sharon is busy managing the $$$
Jackie selects the Gabbie Basket
Linda reviews safety procedures
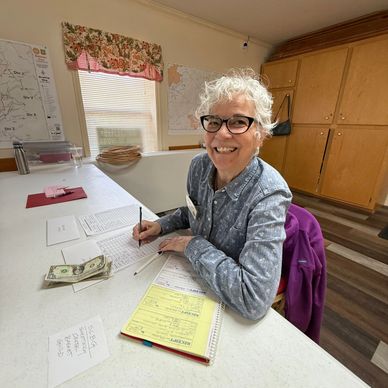
We begin the 2026 season! Sharon set aside the beginning of our weaving time to collect funds for dues, bases for the Stasia basket and kits for the Paper Baskets. Thank you Sharon!
Jackie selects the Gabbie Basket
Jackie selects the Gabbie Basket
Denise, Linda and Melissa work on the Arrow Basket
The Gabbie Basket features a 10 x 15 inch wooden base. This pattern was purchased by members from Bright Expectations.
Jackie modified this basket, substituting braided seagrass for the triple twining. The results were beautiful!
Denise, Linda and Melissa work on the Arrow Basket
Denise, Linda and Melissa work on the Arrow Basket
Denise, Linda and Melissa work on the Arrow Basket
The Arrow Basket features a woven base, a graduated rim and bushel-basket handles. The basket is accented with Paired Triple Arrow weave using a contrasting colored #3 Round Reed. Working together makes weaving so much more fun!
Jeanne begins the sides of the Arrow Basket
Denise, Linda and Melissa work on the Arrow Basket
Jeanne begins the sides of the Arrow Basket
Every weaver seemed to take their skills to a new level, modifying their selected pattern. Our tip of the month came from the GBA newsletter.... Pack as you go!!!! And Jeanne is taking that hint to heart.
Cindy adds color to her basket
Denise, Linda and Melissa work on the Arrow Basket
Jeanne begins the sides of the Arrow Basket

Cindy creates a nice shape for her basket as she adds warm, earthy colors. Beautiful!
Pat works on a modified Alley Basket
Shirley does a preview of a paper basket pattern
Shirley does a preview of a paper basket pattern
Not everyone needs a new laundry basket! Pat was commissioned to make custom Alley baskets that are about 4 inches tall - the perfect height for a serving dish.
Shirley does a preview of a paper basket pattern
Shirley does a preview of a paper basket pattern
Shirley does a preview of a paper basket pattern
Shirley found some finished paper baskets that she did about ten years ago! She was amazed at how beautiful and sturdy they still are! Shirley had purchased paper weavers from The Earth Guild to make a new basket at the meeting.
Patti makes excellent progress!
Shirley does a preview of a paper basket pattern
Susan sets the spokes with precision
Patti was one of four members who attended the South Carolina convention. She is using the Gabbie basket to incorporate new skills that she learned at the convention. The results are stunning! Patti has a great eye for color - a skill that she has perfected in her painting.
Susan sets the spokes with precision
Susan sets the spokes with precision
Susan sets the spokes with precision
Working with a wood base requires a lot of patience to get the spacing just right. Susan has a system to train the spokes as she goes.
Linda brings a visitor, Cheryl Anne
Susan sets the spokes with precision
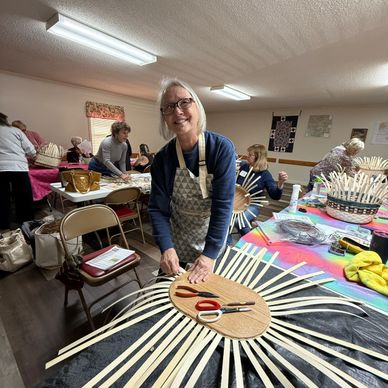
Kimi prepares for the Stasia Program
Visitors are always welcome! It was a pleasure to meet Cheryl Anne, a local pastor.
Kimi prepares for the Stasia Program
Susan sets the spokes with precision
Kimi prepares for the Stasia Program
.jpeg/:/rs=w:388,cg:true,m)
Next month we will be doing the Stasia Basket. Kimi is setting up her basket to demonstrate the Braided Rim. Be sure to purchase your 5" Round Wood Base for the Stasia. The pattern is available from Bright Expectations.
December 10, 2025 Christmas Party
Gathering before the luncheon
Cindy, Patti and Jackie
Polly and Sandy

Shirley and Susan

Luncheon

Luncheon

Luncheon

Susan Z wins the Scholarship!

Gift Exchange

Patti discovers a unique basket!
Janice

Lisa

Lisa and Leslie did a great job organizing the Christmas Luncheon. Thank you!
Time for a Group Picture!

Top Row: Susan, Linda V, Cindy, Lisa, Patti, Linda W, Sharon, Kimi, Jackie, Sandy, and Paula
Bottom Row: Leslie, Brenda, Jeanne and Janice
Not shown: Polly, Shirley
2026 Board Members

Lisa - Hospitality
Jeanne - Communications
Linda - Secretary
Sharon - Treasurer
Kimi - Vice President
Leslie - President
missing - Pat - Member-At-Large
(we missed you Pat!)
November 12, 2025. Christmas Ornament Workshop
Leslie wraps up the business meeting

Let's Weave!
Workshop Sessions:
- Pat - Reindeer
- Sharon - Hearts
- Linda - Angles
- Kimi - Celtic Tree
- Leslie - Butterflies
Pat teaches the Reindeer Pattern
Special thanks to Catherine Sylvester of Tanglewood Baskets for giving us permission to use her pattern for the Reindeer ornament. Click on the link to see her website!
Want to see more of Catherine's patterns? Go to the Missouri Basket Weavers Guild website!
Lisa making Angels
Sharon teaches the Heart
We discussed glue a lot at this station! Quick Cure cyanoacrylate with an Activator is your best option! Linda, who taught this project also tried a glue gun...she does not recommend that option. Good to know!
Sharon teaches the Heart
Sharon teaches the Heart
Sharon teaches the Heart
Sharon and Denise take a moment while the glue dries. Note the beautiful mahogany color that Sharon used.
Paula making a heart
Sharon teaches the Heart
Paula making a heart
Using a good glue is also the key to success for the Heart ornament. And lots of patience! We spent a lot of time waiting for the glue to set!
Success!
Sharon teaches the Heart
Paula making a heart
Lisa, Janice, and Linda show off their finished angels 😇.
Jackie and Kimi create Celtic Trees
The Celtic Trees are beautiful! Jackie opted to make a smaller version by pulling the loops tighter. Kimi modified the base to create a "Tree of Life"
Pat assists Sandy with the Reindeer

The reindeer look complicated, but the directions are easy! Pat brought 1/4" smoked flat oval reed to share. 1/4" flat flat can be used as well. Be sure to really soak your reed well and keep it wet as you work!.
Leslie and Janice
Leslie and Janice
Leslie and Janice make butterflies duing the second session.
Butterflies
Leslie and Janice
These sweet butterflies have limitless variations for size and color. Note that one of them has a copper wire body!
Denise introduces the Paper Basket Project!!
Denise attended a class at John C Campbell on Paper Basket Weaving. It all begins with painting the paper! We are excited to have this class sometime in the Spring or early summer! Stay tuned 😊
The Basic Kit for Paper Baskets

After much discussion, Denise has recommended that we make kits for members who want to make these beautiful baskets. The kits will include a mold, precut paper, toothless alligator clips, and waxed linen.
October 8, 2025 - Bias Weave Pickle Jar Baskets
Bias Weave Pickle Jar Baskets

Instructors: Kimi and Leslie
Weaving on the bias is a new skill for many of us! Kimi spent hours making many baskets and documenting all the steps with excellent pictures and drawings.
Thank you, Kimi!
Leslie and Lynn
Setting up the base.
Jackie and Brenda

This takes concentration!!
Paula, Leslie and Sandy

Twining around the base with cord, bulky yarn, or string.
Quart sized basket
Love the color!!!
Kimi introduces the next step

Starting the diagonal bias weave.
Members were encouraged to watch a video prior to our meeting.
Kimi
Moving on to the next section
Polly, Leslie and Susan

Kimi did an excellent job writing detailed instructions. Polly and Leslie are reviewing the process.
Kimi and Jackie

Turning the corner!
Denise
Denise's basket is beginning to take shape. A good reason to smile!
Teamwork!!

Patti wanted to finish a basket and needed a filler for the rim. After realizing there was no seagrass, she and Lynn worked together to braid a filler from the materials available 😊.
Bringing back the Lending Library
Lisa and Sharon went through the storage closet and found many beautiful books on weaving by excellent basket weavers. So Lisa brought back the tradition of a lending library.
September 10, 2025 - Patchouli Biscuit Baskets
Patchouli Baskets

Instructors: Kimi and Leslie
The Patchouli Biscuit basket features a rim that uses beads. Leslie wove the three beautiful baskets above. Note the shaping of each basket - creating a variation of the same pattern. Leslie is also very resourceful! She found necklaces at a thrift store and used the beads on the rims. Those silver beads add a nice "bling". 😊 Also note that Leslie used multiple beads between staves to add more interest and fill the space.
Melissa
Melissa begins by evenly spacing the spokes into the base.
Cindy, Lynn and Kimi having FUN!

Kimi brings her basket to show the next steps to Cindy and Lynn. The instructors take a lot of time to prepare and practice each basket to provide "hints and helps".
Linda M
Linda locks in her staves with a few rows of twining.
Polly

Polly loves color! We can't wait to see how these colors look when she is done.
Paula

Paula moves to the twining section of the basket.
Jackie
Jackie used a bowl to assist with the shaping of her basket.
Sandi
Sandi selected a rich mahogany color for the staves.
Sandi also brought a Gourd Basket to share. Check out the Photo Gallery!
Susan

Wow! Susan made excellent progress during our meeting! Check out the shaping! Well done!
Sandy W shares another basket
Sandy W shares another basket
We have a new section in the Photo Gallery called Member Creations. Check it out! This month, we added a gourd basket by Sandi L and Williamsburg baskets with unique handles by Sandy W.
Cindy and Lynn
Sandy W shares another basket
Thinking about our mission
This picture was too cute not to include! We definately have a good time!
Thinking about our mission
Sandy W shares another basket
Thinking about our mission
So proud to be a member of a guild that is committed to sharing, learning, and creating.
August 13, 2025 - Williamsburg Baskets
Williamsburg Baskets
Kimi shares our next project
Kimi shares our next project
Instructors: Leslie and Lisa
The Williamsburg basket features a unique handle that guides the shape of the basket from a square base to a round rim. Leslie and Lisa researched and then wrote our patterns for the 5, 7, and 10-inch baskets. This is a pattern that provides the weaver with many options in color, size, and pattern. Patterns were shared in the email from Leslie to the Members.
Kimi shares our next project
Kimi shares our next project
Kimi shares our next project
The meeting included an update from our VP, Kimi. Kimi is searching for ideas for the spring projects. She has dubbed this season the "Year of the Rim". If you have an idea for a guild project, please use the Contact Us option to send us pictures or descriptions.
New Member - Susan Zehner
Kimi shares our next project
New Member - Susan Zehner
We are excited to welcome Susan, who retired from a career in education. Susan has 6 years of weaving experience! We look forward to learning from her. 😊
Sandi
New Member - Susan Zehner
It's great to have Sandi back! After spacing and securing the base, Sandi starts to upsett the staves, spokes, or stakes. (Ha! Depends on what pattern we read!)
Jackie, Brenda, Cindy and Patti

What fun these ladies are having today!
Sandy and Leslie

Sandy used a spaced dyed reed for her weavers. The result is beautiful!
Paula
Denise
Paula is pleased with her progress on her 10-inch basket. Paula also attends and helps with basketry at Oasis!
Denise
Denise
The Williamsburg is traditionally done in all-natural reed. Denise is following that tradition! Next month, she will be taking a class on Paper Weaving at John C. Campbell Folk School. We can't wait to learn more about this variation in weaving!
Linda

Linda took on the challenge of the small 5-inch basket in a beautiful shade of green! And she is still smiling! 😉
Pine Needle baskets

Shirley brought a pine needle basket to work on this month. She and Sandy have been in classes at Oasis. Additionally, Sandy loves doing antler baskets! They brought their work to share this month. To see more detailed pictures, click on the button below!
Melissa
Once the first three rows are complete, Melissa is ready for the weaving to get easier! Melissa noted that working with dyed reed can be a challenge at times. Our "Tip of the Month" introduced a product called Retayne that reduces the amount of "bleed" of the dyes.
Janice and Sandi

Sandi shares some weaving ideas with Janice about how to work with thick, stubborn weavers. It's all about patience!
2025 July 9, 2025 - Ida Basket
Kimi introduces the first steps for the Ida Basket

Instructors: Kimi, Pat and Leslie
This month, members could either order the Ida Basket and choose from many different colors or purchase the pattern and use their own materials. The Ida basket used a 4 x 7 oval base. Skills for this basket included shaping, the 4-rod wale, adding trim to the rim, and the X embellishment.
As we get started, Kimi reviews a few key points that she learned while weaving this basket prior to the meeting. It's great to have that experience to assist others.
New Member - Polly Agee

Polly recently moved from Alpharetta and is now living full-time in Blairsville. She recently retired as a VP for a contract engineering firm. These days, she loves time with her granddaughter. Polly shared that she is excited to learn more about weaving. Welcome, Polly!
Melissa
Now that Melissa has evenly spaced her spokes, she is ready to lock them into place.
Ginny

Ginny is working on the spacing for her spokes. The pattern included the directions to create a template to guide the placement.
Vickie

The next step: 4 rod wale!
Here is Vickie, who also teaches basketry at William Holland Lapidary School.
Janice
Purple! This color choice is looking good! Janice is creating the space for the X pattern using 3 rows of 1/4' FF and an overlay of 11/64" FO. We learned that important steps might be missed if we don't really read our pattern and follow each step!
Denise

Denise works on creating a nice curve from the base of her basket to the sides that go straight up.
Pat and Jackie

This month, Jackie opted to work on a large Market Basket. Her color choice is stunning! Pat takes a break after she taught us how to start and stop the 4-rod wale.
Cindy
Linda
Cindy has done a great job using the "Over 2 / Under 1" continuous weave to create the beautiful pattern of the Ida Basket.
Linda
Linda
Linda pauses briefly to pack her weavers to achieve the desired shape for the base of the basket.
Sandy and Leslie
Leslie works with Sandy on how to finish the 4 - rod wale. The step up is a bit tricky!
2025 June 11th - Decorative Handles
Leslie shares possible projects at our business meeting

We are looking forward to more great projects this year! One option is the Williamsburg basket. Advanced weavers could choose the Williamsburg Crossing Basket shown here.
6 Stations and 4 mini sessions

Instructors:
Leslie, Kimi, Lisa, Pat, Sandy, and Jeanne
The 6 stations included:
Kimi - Double and Triple Braid
Lisa - Geometric Designs
Jeanne - Butterfly Knot and Splice
Pat - Beverly Ashton Vickers Zigzag pattern (bring an 8 " piece of 1/2" FF dyed)
Sandy - Chevron (Jill Choate), and Mosaic
Leslie - Ribbed Handle/Figure 8, Cross Handle, Intricate Wrapped Handle and Paired Reed.
Lynn and Leslie
Session Sign up Sheets
Lynn and Leslie chat before class begins. Weavers practiced handle designs on paint sticks and then could opt to work on their own handles.
Session Sign up Sheets
Session Sign up Sheets
Each weaver could sign up for up to 4 mini-classes. This turned out to be a great way to teach many decorative handles and allow weavers to choose.
Lisa works with Lynn and Linda

Lisa shares creative patterns, showing that the sky is the limit when working with handles.
Cindy and Brenda

Success!
Showing off their Butterfly Knot 👏
Kimi teaching Double Braid

Patti practices the Double Braid on a paint stick. Can't wait to see this decorative handle on one of her baskets!
Pat and Janice

Pat's session focused on a handle featured in a video by Beverly Ashton Vickers. This pattern gives lots of color and interest to a handle. Janice is pleased with her Zig-Zag Pattern. 😊
Sandy and Sharon

Sandy made starter handles for her session to ensure success for a very complex handle. Thank you, Sandy!!!!
Taking a break between sessions

Jackie and Lisa enjoyed "catching up" during a break.
Leslie, Judy, and Linda
Leslie, Judy, and Linda
In Leslie's class, weavers could choose from four different handles. One of the most popular handles was the ribbed handle using #5 Round reed and cane.