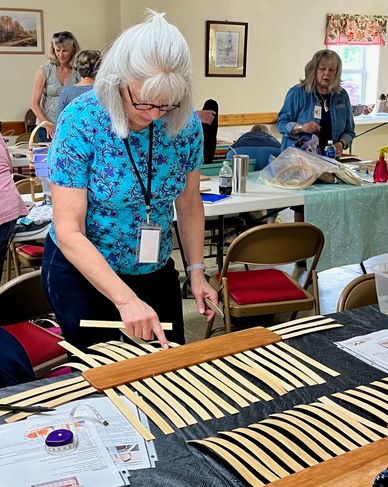
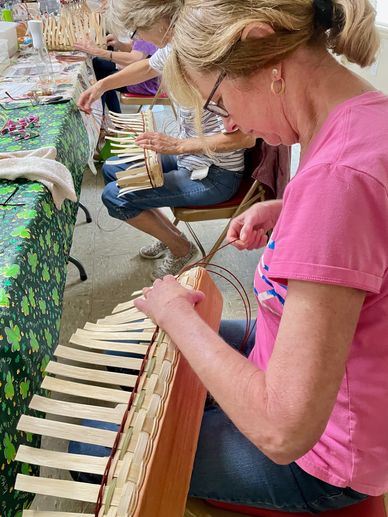
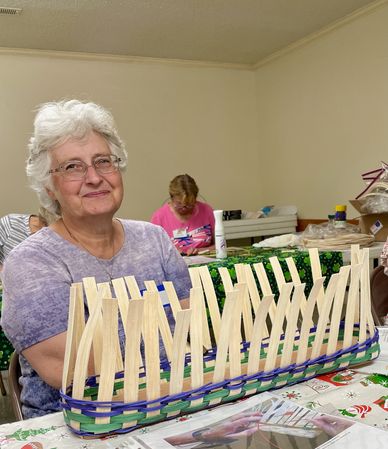
May 8, 2024 - French Breadbasket
Jackie Sapp teaches

Jackie is a gifted teacher! We are so fortunate to have her teaching another class this season! Jackie brings baskets at different stages of the weaving process to help us "see the process".
Patricia Neubert and Jackie worked together to adapt Joan Stoneham's basic design for the French Breadbasket. They added the Three Rod Arrow pattern as a new skill for the guild. The results of their work was an excellent pattern that members will be able to use for years to come. Well done!
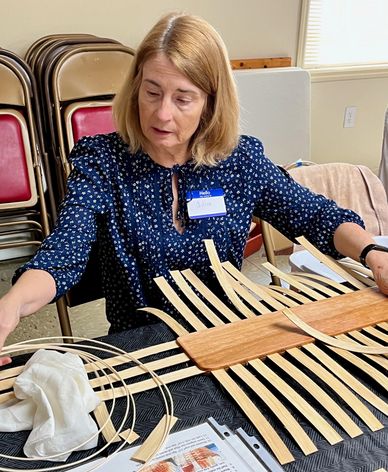
Getting the spokes in place
Patti counts the spokes to be sure she has the correct number = 38! Note the beautiful base made by a local vendor and supporter of the guild.
Twining the first 2 rows
Lisa (front right) uses a contrasting color of round reed to twine the first two rows and "lock-in" the spokes.
New Member - Colleen
Welcome to one of our newest members, Colleen! So glad she found us!
Returning Member - Vickie
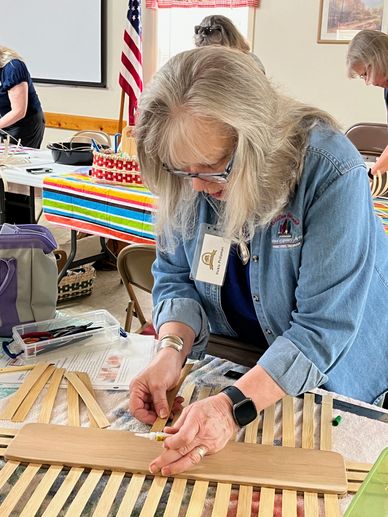
Cindy begins the Arrow Pattern
Welcome back Vickie! So glad your schedule allows you to return to the guild.
This basket is so large and the spokes are short, so we glued the spokes in place to provide greater stability.
Cindy begins the Arrow Pattern
Cindy begins the Arrow Pattern
The color selection for this basket will highlight the arrow pattern that Cindy is creating. This new pattern requires a bit of concentration!
Jackie assists Patti with the Arrow Pattern
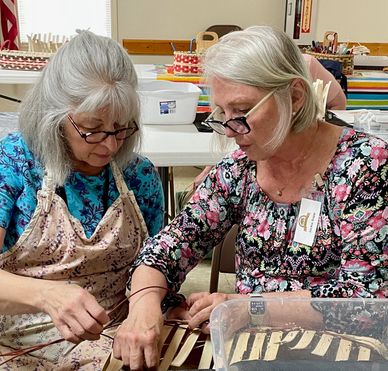
This basket can be modified in so many ways. A new skill was taught during the class - the Three Rod Arrow. By using three colors, the arrows "pop" and provide an interesting element in the basket.
Spaced-dyed reed adds color
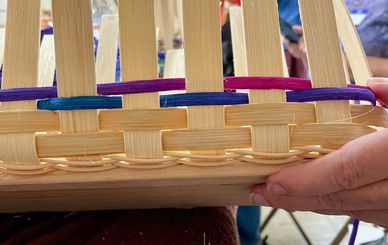
Members brought a wide variety of dyed reed to create this basket. Truly, each basket will be a "one-of- kind"!
Pat pauses to work with Brenda
Pat worked the room to assist weavers as they progressed. Pat and Leslie have made the commitment to our guild that includes "making the selected basket before the meeting" so they can effectively assist new weavers. Now that's commitment!
Linda W. chooses Spring Colors
Wow! Linda made great progress on her basket.Check out the twining to create the arrow pattern.
Sharon uses dyed Spokes
Sharon brings life to her basket with color!
Linda M. creates the Arrow Pattern with shades of green.
The shades of green selected by Linda show off the arrow pattern.
Check out the link below to see the finished Towel Holder baskets from last month!
June 10, 2024 - Poplar Bark Basket
Caleb Arnold - Guest Teacher

Many thanks to Caleb Arnold and family for all their hard work. Caleb prepared Poplar logs and Hickory saplings for the class. And he brought boxes and boxes of tools too! The guild had so much fun with this project and we created many beautiful baskets. Looking forward to visiting his family farm near Ellijay in the future to learn more about natural resources in our forests. For more information, Caleb can be contacted at: everwilderfarm@gmail.com.
Or visit the website at
"A small scale, regenerative farm offering outdoor educational experiences in Ellijay since 2019."
Peeling the Bark

Sandi begins by peeling the Poplar Bark from a sapling. This process can only be done in late April, May and early June. This is the end of the season to harvest bark.
Folding the bark to create the basket

Kathy is so excited about the beautiful basket shape she has created. We all had so much fun - learning and sharing.
Linda and Lisa - all smiles!

What fun we had making this unique basket!
Caleb brought Hickory that he prepared for the class. He begins by "beating" the Hickory saplings and then carefully peeling the bark to create long strips. Then each strip is divided many times to get the right thickness for lashing material. Wider strips of hickory are used for the rims and handles.
Caleb teaches the next step

After we use a pattern to determine the placement of holes for lashing the sides, Caleb sets us up at a "burning" station outside.
Some members used a drill or Dremel to make the holes for lashing. Others used a heated sharp tool to make the holes. And some started with the drill and then gave the holes a nice "burnt" finish.
Preparing for lashing

Leslie moves outside to burn the holes for the lashing. We used torches to heat our tools to burn holes on the sides and just below the rim. Hickory was used for the lashing.
Deb gets some coaching

The lashing begins! If you can't get your hands inside your basket then you can take the basket apart and lash it loosely at the sides. Then, once both sides have been lashed, just tighten up the sides! The last steps are the rim and handle.
Linda is ready for lashing

Note the interesting texture of the hickory rim! Can't wait to see how Linda finishes her basket.
Caleb assists Cindy with rim

Caleb shows Cindy where to drill or burn holes to lash on the rim. Notice the way the natural wood bark creates interest with knots and holes.
Sandi finishes her bark basket

Check out the cross stitching!
Each weaver used their new skills to modify and customize their baskets.
Denise adds a hickory handle

Wow! What a beautiful Basket! We were joking that this was the first time that many of us actually finished a basket in one session! 😊
Willow and her grandson had a great day!

Basketry brings together the generations! ❤️
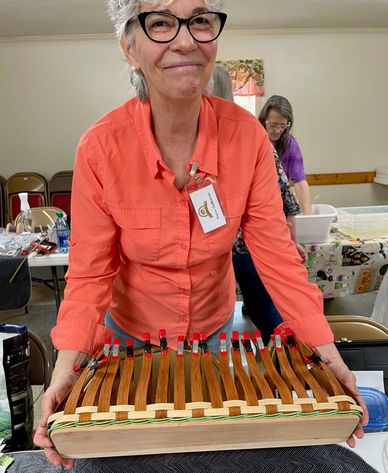
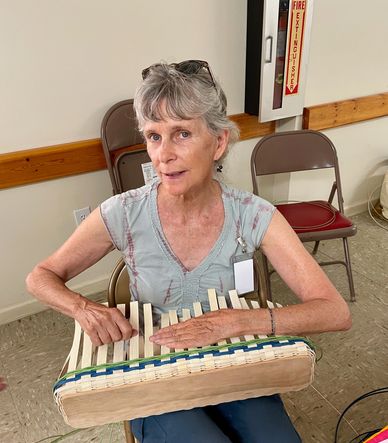
July 10, 2024 Ribbed Berry Basket - Willow Love, Instructor
Our Instructor, Willow

Denise, Willow and Cheri
A special thank you to Willow who provided all materials for the Ribbed Berry Basket! This included the Honeysuckle rims, round reed that was dyed (thank you Leslie, Bonnie and Jeanne who helped), yarn, iris leaves and the full color instructions. These instructions focused on the process to make a ribbed basket. Willow and Jeanne also made videos for members to view before the class. All members were invited to take home the materials for a second basket. Wow! This class was a generous gift to our members from Willow. We all appreciate her hard work to make this class a success.
After the 3-Point Lashing....

Lisa and Linda create the shape of their baskets as they add ribs.
Sharing

Brenda, Cindy and Patti working "knee to knee" as they add new weavers.
Berry Basket Fun!

Kimi working on the three point lashing
Using vivid colors!

Sandi zoomed ahead...creating a beautiful basket!
Imagining the shape of the basket
Leslie showing how adjust the ribs to shape the basket
Berry Basket
Using flat reed to add a new dimension
Berry Basket

Welcome New member - Cheri 😊
Berry Basket

Sandi and Cheri
Berry Basket

Vickie, a basket teacher at William Holland Lapidary School, chats with Kimi
Adding texture

Using Yarn as a weaver
Adding natural elements

Using Iris Leaves as a weaver
August 14, 2024 Gathering Basket or Weavers Choice
Organizer / Gathering Basket
Instructors: Leslie, Lisa and Patricia
The variations of the Gathering Baskets were a true demonstration how the weaver can make a basket their "own".
Leslie, Lisa and Patricia were well prepared to assist weavers to make this basket.
The free pattern from Gina's Baskets was enhanced by Leslie with some hints and helps.
To see samples of the baskets, click on the button below.
Organizer / Gathering Basket

Jackie, Lisa and Brenda compare notes as they get ready to start their baskets.
Organizer / Gathering Basket
Organizer / Gathering Basket
Vickie came prepared to start her basket from the very begininng! Other weavers completed the base before the class. Note the spoke weights she is using to help "control" the reeds.
Setting up the base
Organizer / Gathering Basket
Linda uses one of the instructors baskets as a model to begin setting up the base
Completed Base
Lisa, one of the instructors, brought her basket completed to this stage for demonstration. This base is ready to be upsett!
Organizer / Gathering Basket

Lisa has chosen very contemporary colors for her basket. Can't wait to see the finished product!
Next Steps
Organizer / Gathering Basket
Leslie and Sandy discuss the next steps to build the sides of the basket. Notice the space dyed reed that Sandy has selected.
Organizer / Gathering Basket
Organizer / Gathering Basket
The instructors worked the room to help weavers as needed. Here, Pat assists Lynn.
The Gathering Basket was a "challenge" basket and we are excited about the progress members made today!
French Bread Basket

Felice opted to work on her French Bread Basket. Pat Neubert assisted as she got ready to "cut and tuck".
Organizer / Gathering Basket
Who is this "Wonder Woman"!!! Sandi made amazing progress on her basket in one short class!
Berry Basket Basket

Jane decided to continue her Berry basket from last month. What a great color pallete! Here she is beginning to "fill in" as she gets closer to the center of the basket.
Berry Rib Basket and New Members
Willow assists two new members, Susan and Kathleen, with their Berry Baskets. This was a great basket to be introduced to weaving. Creative and a simple weave. To see a few more completed baskets by members, click on the button below!
September 11, 2024 Nantucket Vase
Nantucket Vases

Instructor: Patricia Neubert
Aren't these vases beautiful! (and useful too!) This Nantucket Vase uses a plastic mold , a 4" Cherry base and a 5" inch rim. The guild provided the kits for purchase. Members brought their own reed and cane. Pat Neubert taught the class and also wrote the pattern which was provided at the Guild meeting. This was an excellent opportunity to experiment with twining, creating patterns and learning the basics of making a Nantucket creation. Thank you, Pat!
Starting the Vase using a mold

Linda starts her vase using the plastic vase as a mold. Prior to class, the base and rim were sanded and coated with polyurethane (if desired). Then the base has been glued to the vase. The next step is to evenly insert the staves.
Kimi starts the first row of weaving.

Each weaver provided colors of their own choice for the 1/4" FO staves and the 2.25 Hamburg Cane.
Is that purple I see! 😊
Weaving the first rows

Melissa, Cheri and Linda finished the first 3 rows to lock in the staves. Next step: upsett their staves by using a rubber band to "pull in" the dampened staves to the form of the vase.
Linda chose a darker cane to set off the colorful staves!

Linda goes wild with color! We can't wait to see the finished vase! It's going to be beautiful!
Having fun creating their own pattern

Kathy and Shannon are using a light natural cane to create the pattern for their vase.
Twill Pattern

This vase is almost ready for the rim! Note how the twill pattern adds interest and texture to the vase.
Sometimes we need more than 2 hands!

Pat assists Jackie as they fit the staves into the rim. Glue holds the staves in place inside the slot in the rim.
More creativity
This weaver began the vase with a natural cane and then switched to a beautiful blue dyed cane. The dyed cane takes on color differently - creating more texture in the twill pattern.
Felice and Lynn

Note that Felice is using a stand to raise the Vase as she completes the first three rows. After the staves have been "trained" to hug the vase, Lynn can now weave holding the vase on her lap.
Another variation

This weaver decided to use a simple "over, under" continuous weave. Very elegant!
Twining over Space-Dyed Reed
Patti's design choices began with a space-dyed reed that added multiple colors. Then the twill pattern she selected brings it all together. Well done Patti!
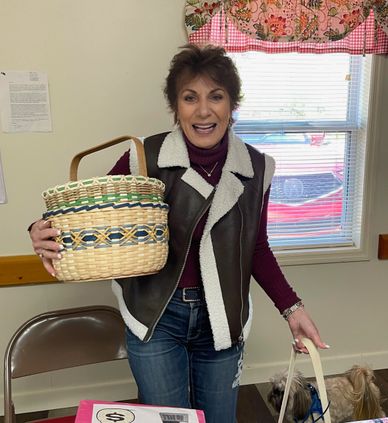
October 9, 2024 Tribal Basket
Tribal Basket
Instructors: Leslie Wagner and Patricia Neubert
This month we decided to do a kit from Gina's Baskets- the Tribal - using Spaced dyed reed for middle of the basket.
This basket was selected for the skills used:
- Twining a Round Base
- Shaping skills
- Weavers choice for colors and rim
- Waxed Linen lashing
- Curl Embellishment
Weavers could order the basket kit or only the pattern from Gina's.
Spacing the spokes for the round base
Patti pauses to check the spacing of the spokes for the round base. Prior to class, weavers were encouraged to watch a YouTube video by Bases to Weave featuring Debbie Hurd. This video taught us how to Twine a Round Base.
Pat and Leslie working the room

Pat and Leslie did an excellent job working the room to support weavers that had not created this type of basket before. There were many new skills for our beginner weavers: Twining, shaping, creating a round woven base, and a rim using yarn and waxed linen.
Leslie shared how to get a tight curl for the embellishment using needle nosed pliers.
Weaving the first rows
Kathleen packs the base.
Cindy uses a cork board and a push pin to secure her spokes for the first three rounds of twining.
Kathleen packs the base.
Kathleen packs the base.
Kathleen packs the base.
Kathleen brings a happy attitude to basket weaving! The basket doesn't need to be perfect! Here she is packing the twining before upsetting the spokes to begin the FO weavers.
Training the spokes
Kathleen packs the base.
Kathleen packs the base.
Linda pulls up and secures her spokes to train them to the desired shape. After the twining, we used used 3/16" FO weavers - start and stop - shaving the beginning end for each row to reduce bulk. Linda came well prepared with all the right tools!
Pat and Shannon
Pat and Shannon check out the twining used to create the round base before going to the next step.
Weavers could also download excellent written directions for twining a round base:
Written Directions from Joanna
https://joannascollections.com/blog/twining-a-round-base-tutorial
Working on the shape
This basket has a "bean pot" shape.
Kimi re-worked her basket to get the 45 degree angle just right for the transition from the base to the sides of the basket.
Looking good Jackie!
Jackie is ready to complete the rim row after she "cut and tucked".
Lynn and Bandit

Lynn opted to finish her Nantucket from last month. It's always great to have the flexibility to choose which project you want to work on. Even better - to work with friends! 😊
Looks like Lynn found a new friend too!
Changing up the colors
Changing up the colors
Kimi did an excellent job shaping her basket. She also selected different colors for the center rows to match her home decor.
Another variation
Changing up the colors
Jackie decided to use black Hamburg cane and seagrass for the rim. The dark lashing picks up the black in the Spaced dyed reed from Gina's. Note the use of tools to make the job easier! A "Lash Buddy". Available at The Country Seat and NC Basket Works.
2024 November 13th - Candy Cane
Candy Cane

Instructor: Linda Vanderlaan
This month the Guild provided the frames and the 3/16" red reed for the Candy Cane decoration.
Linda wrote the pattern which was provided in the Members section. Lucky for us, we didn't need to dye the reed before we started. 😉
This simple project using a continuous over under weave was fast and easy to do. Thank you Linda! And thank you to Leslie for planning ahead so we were able to have a beautiful shade of red reed from Gina's.
Patti and Linda
Patti watches Linda start the first section of the Candy Cane.
Lynn

Lynn starts the curve of the Candy Cane. Lynn started at the top and worked her way around to the bottom. Either way works for this project.
Working the Curve

Jackie is nearly done with the Candy Cane. Working from the bottom up, the curve requires different spacing.
Jane

As each weaver finished, we all jumped up to take pictures and see the completed project. Jane did a great job! The next step is to dress up the Candy Cane with her choice of embellishment.
Lisa

Every weaver can opt for something a little different. Lisa decided to make an all red Candy Cane with a large ribbon embellishment.
A completely different look!
Kimi
This month Kimi decided to take advantage of the support in the group to complete her Gathering Basket. Kimi had dyed her turquoise reed to make this one of a kind basket. Leslie, Lisa and Pat were available for support.
Pat shows an embellishment option
The Candy Cane lends itself to a wide variety of embellishments to complete the look a weaver might want. From Country to Formal, this project can fit in any decor!
Jackie and Sandy
Well done ladies!
New Member, Shirley

Welcome to Shirley Snydor, our newest member! Shirley has years of weaving experience and is so excited that our guild is so close to her new home. We look forward to getting to know her.
Linda and Sandy

How much fun we had with Linda! Sandy's Candy Cane looks beautiful with the embellishments that she selected.
The end of another meeting!

It was so exciting to see that everyone finished their Candy Cane during the meeting. Thank you to Linda for teaching the class.
😊 ❤️ 👏
2024 December 11th - Christmas Party
Delightful Luncheon at Epic Catering

Denise, Patti, Cindy and Melissa select their lunch from the special menu provided by Epic!
This year Epic Catering and Eatery in Hayesville opened their doors on a Wednesday for a private party for the Guild! Special thanks to Chef Carl and our lovely server, Brooke.
Lunch is Served!

Guild members Lisa, Kathleen, Jackie, Shannon and Sandy enjoy their lunch!
The desserts were amazing too!
Denise Phillips Wins the Scholarship!

We are so excited that Denise won the $200 Scholarship this year. Denise will be able to use the scholarship to take a class of her choice. Then, she will return to the guild to teach! We can't wait to see what she selects.
An opportunity to develop friendships

Jackie and Shannon share stories of how they came and settled in this part of the country!
Leslie and Sharon
What fun! One of the best parts of the Christmas party is a chance to learn more about each other.
Picture time!
Kathleen and Sandy pause for a photo op! And Kimi and Jeanne share a moment together!
Thank you ladies!
Time for the gift exchange
Melissa selects a gift from the table filled with surprises! Will she get to keep her treasure? Or will someone "steal" it?
Cindy is excited about her gift! And the Gifts to others!

Each member that wanted to participate in the gift exchange brought something to share. Cindy was the lucky recipient of a painting by Patti Franklin.
ANNUAL CHARITY DRIVE
Special thanks to Cindy for organizing our charity drive. We reached our goal of $1,000!
"Thank you!" to our generous members!
$500 was given to REACH of Clay County. And the Valley River Humane Society received $500 in dog and cat food.
Unique weaving materials!

Shannon and Sandy check out the beautiful and unique weaving materials. As you can tell, Shannon is already thinking about her next project 😊
Yahoo!
Kathleen was one of those members that chose a new gift many times - only to have someone "steal it" from her! Finally, at the end, she received some new reed and quality tools for weaving. Yeah!
Too much fun!

We all got a chuckle as one gift made it's rounds from person to person. But alas, we had a rule - a gift could only be stolen twice! The third "owner" got to keep their prize! 😊. Did Pat get to keep this treasure?
Lisa and Jeanne

All the games are done, the food has been enjoyed and we pause to celebrate the friendships we have built this year.
See you in April!
Members can check out the Members section to learn about winter gatherings.
2025 April 9th - Alley Basket
Pat Neubert gets ready
Pat welcomed back everyone for our first program of 2025! We had a very productive business meeting before we started to weave!
The Alley basket is a versatile and very functional basket! Pat and Leslie were our instructors for this months project. What a wonderful time!
Leslie works with new member, Janice

Janice came well prepared with some unique dyed reed for her basket. Leslie modified the pattern a bit and assisted Janice with the twining to set the spokes.
Kimi and Sharon get started.
This basket provided many opportunities to customize the basket. Note that Sharon is using a dyed reed for the spokes. Kimi brought reed that she dyed herself for a total custom look. Leslie did a great job providing alternative materials lists.
Linda, Shirley and Sandy

Shirley had fun sharing how to add decorative embellishments. We all had a good laugh when she showed us how her basket "grew"! It made us realize that this basket had a lot of potential.
Janice Upsetts the spokes
Welcome to Janice, one of our two newest members! We can't wait to see how she decides to complete her basket.
Lisa and Paula

We are excited to welcome back Paula to the guild. Paula was a member in 2018 and is an accomplished weaver. And she is fun! Lisa met Paula at Oasis.
Pat, Shirley & another Linda 😊
Shirley uses thin maple strips to do the curls on her basket. Using Pat's experience with this basket, note that she is doing the curls before the rim is complete. This gives space for the embellishment before the rim packs everything tightly.
Jane makes excellent progress
So glad to see Jane again! She is ready to check her spacing before she moves on to the next rows. Her shaping is giving a gentle curve to her basket.
Emily and Jackie Sapp 😊
Jackie and Emily were a productive team today! What beautiful baskets. It also looks like they both hit the jackpot in the Mother-in-law and daughter-in-law category. They had fun together!
Same pattern - and look at how different each basket is!
Linda W's Basket
Leslie's Basket
Sandy's Basket

2025 May 14th - Fruit Basket
Pat Neubert Leads May Meeting

Thank you Pat for a great two years!
May election results:
President: Leslie Wagner
Vice President: Kimi Wildgust
Secretary: Linda Wojcik
Treasurer: Sharon Del Bianco
Customizing the Basket

Instructors Leslie, Lisa and Jeanne all brought a different look to the Fruit Basket.
Sharon - our new Treasurer
Sharon - our new Treasurer
Sharon gets the spokes locked into place as she twines.
Leslie assisting
Leslie assisting
Sharon - our new Treasurer
Leslie and Sandy work on the shape of the basket.
Janice
Leslie assisting
Twining
After trimming the spokes, Janice spaces them as she begins to twine.
Twining
Leslie assisting
Twining
Great job twining! Note that this weaver pre-stained her base and handle.
Lisa and Leslie Assist
Kimi practices Chase Weaving
Paula
Shirley
Seagrass needs to be packed and packed again!!!
Shirley
Shirley
Getting ready for the rim row.
Pat's Book

Gift of appreciation for all the work to support the guild.
Weaving Memories Together
